-
Notifications
You must be signed in to change notification settings - Fork 0
Tutorial: Configure Visual Studio Code with PolicyApplicator
Microsoft Visual Studio Code is a very usefull editor to author many different type of file formats and scripts. In this short guide we will show you how to use the PolicyApplicator to preconfigure Visual Studio Code in the following way:
- Disable automatic updates
- Disable telemetry
- Disable crash reports
The first the we want to do is to capture a configuration from Visual Studio Code. To do this we need to install Visual Studio Code and configure the desired parameters.
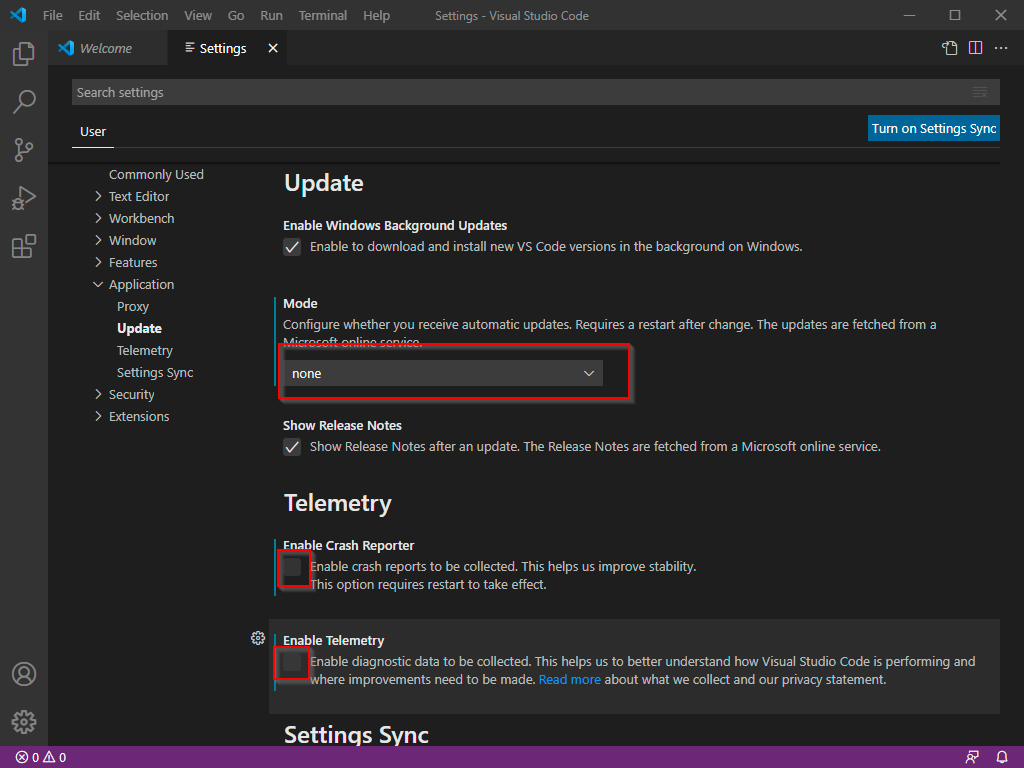 So we start Visual Studio Code and go for the settings:
- Search for the Update mode and set it to none
- Search for Enable Crash Reporter and uncheck the box
- Search for Enable Telemetry and uncheck the box
Next search for the settings file of Visual Studio Code which is located usually under %APPDATA%\Code\User\settings.json.
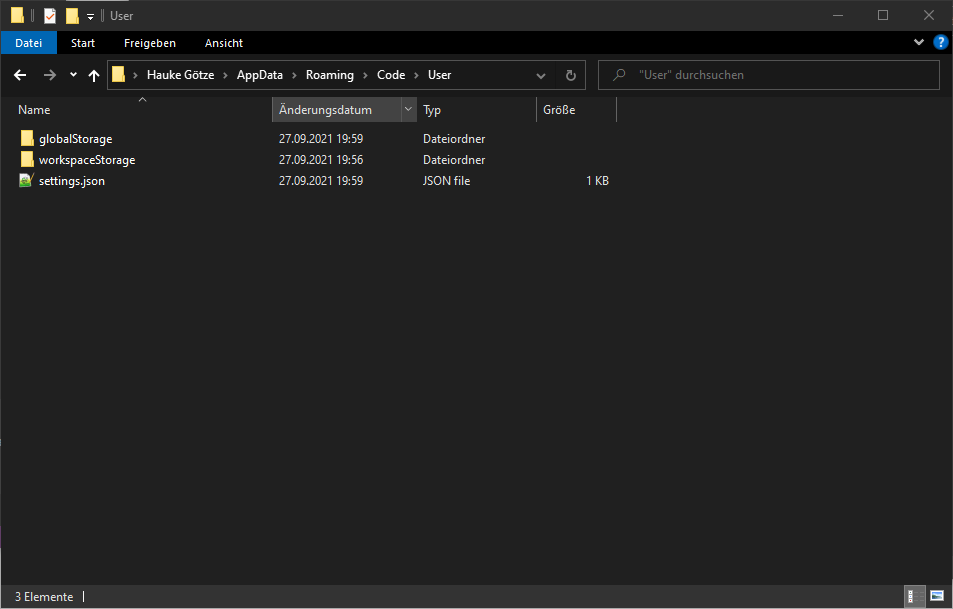 Open the file and review the content and see if it fits what you configured in the the first step 1.1.

If the file looks fine note the path to the file.
Next we download the PolicyApplicator Conversion Kit from the Microsoft store or the release page. Make sure you download a release that is at least version 1.0.7.x. Extract the files on your hard disk.
Once you extracted the files open up a powershell and run the Convert-JSonToOMACSVTemplate.ps1 as follows:
.\Convert-JSonToOMACSVTemplate.ps1 -FilePath <PATH TO THE settings.json of Visual Studio Code> -PathOnTargetSystem "%APPDATA%\Code\User\settings.json" -AppName "Visual Studio Code" -AppPolicyName "settings.json NoUpdateNoTelemetry" -Context User -OutputFilePath "<PATH TO THE PROFILE TO UPLOAD>"
like in the following screenshot:

Now your generated profile file from step 2.2 is ready to be uploaded to Microsoft Intune. For this we use the extracted Invoke-CSVToIntuneUpload.ps1 script and run it as follows:
.\Invoke-CSVToIntuneUpload.ps1 -FilePath "<PATH TO THE PROFILE TO UPLOAD>" -PolicyName "<NAME FOR YOUR NEW POLICY IN INTUNE>"
You will be prompted to signin. Use an administrative account to sign in. If your are prompted for an administrative consent you should grant the consent.
Next we signin with Microsoft Intune and search for the newly created configuration profile.
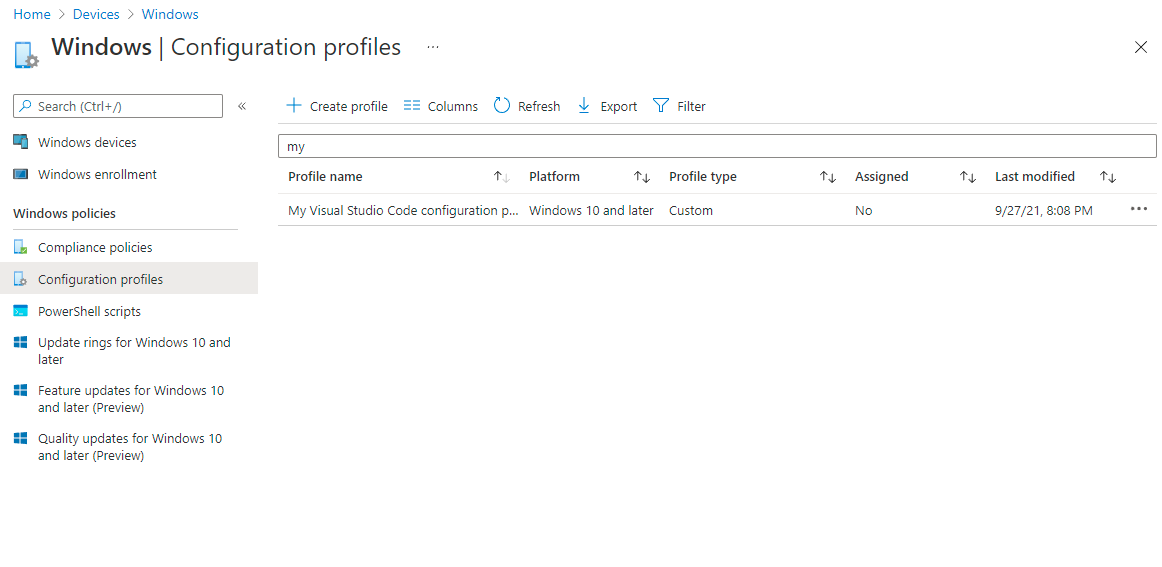
Click on the profile and click Assignment to assign the policy to the group of your choice:
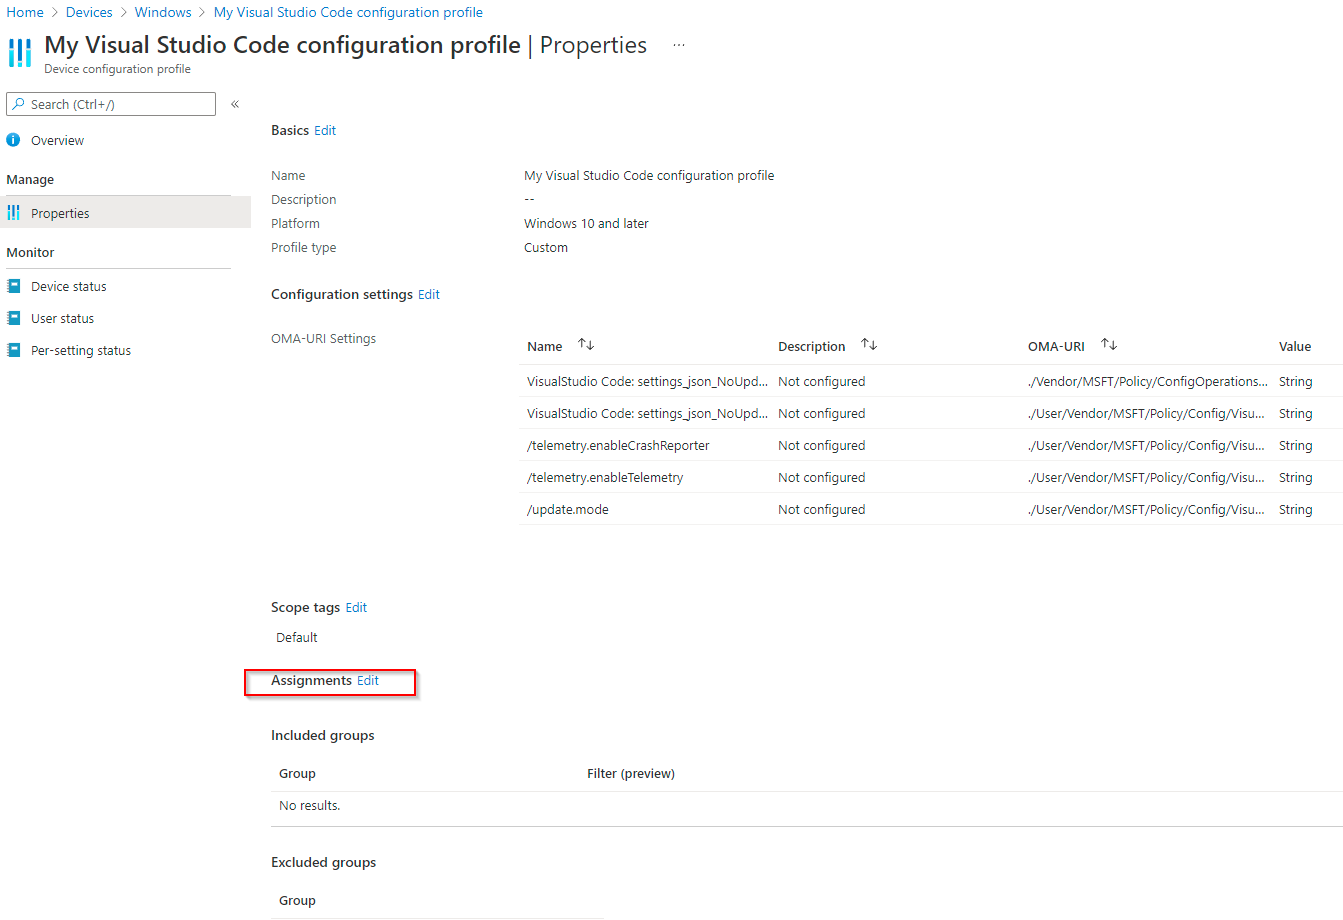
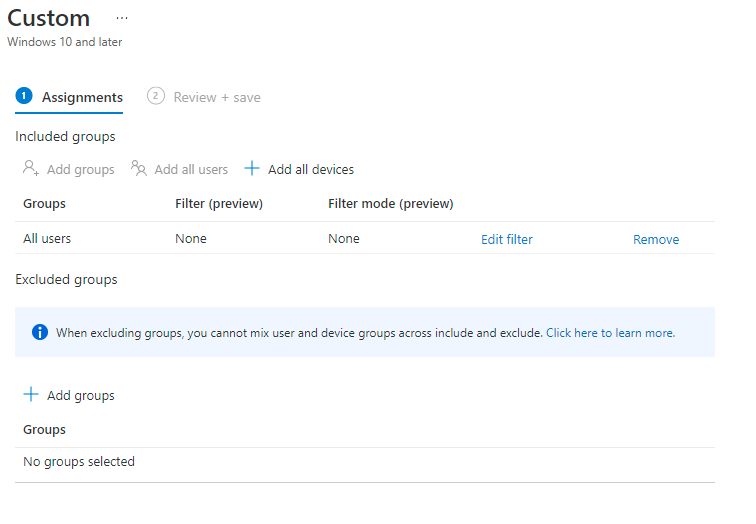
Before the policy can be applied to the system the PolicyApplicator Agent needs to be installed on the machine.
You can check the Agent Installation Guide to see how this is done.
So this is it :). Now lets see on a target system how the PolicyApplicator takes effect.
Use the Windows+R key combination to open up a run as dialog. Enter appwiz.cpl to go for the add- and remove apps control pannel. You should see the installed PolicyApplicator app there:
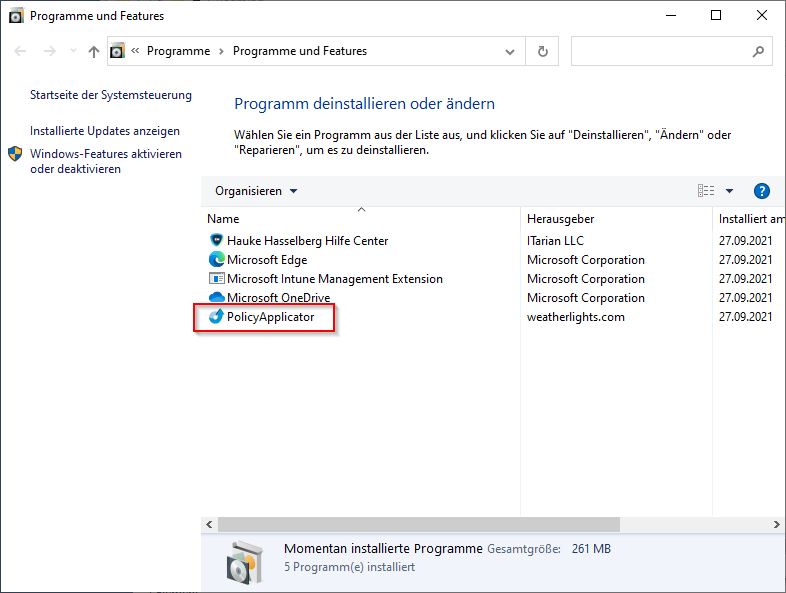
Before the PolicyApplicator Agent can write settings to the json file they need to be transfered from Intune to the registry from where the PolicyApplicator Agent can read them. You can check the HKCU:\Software\Policies\weatherlights.com key for your policy:
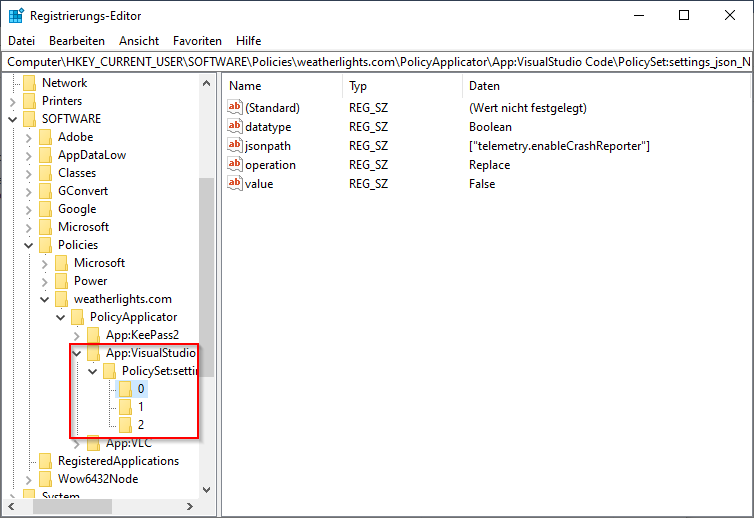
If everything else worked fine so far you can move forward to check wether the settings.json file has been written to the %APPDATA%\Code\User\settings.json.

The last step to do would be download Visual Studio Code and launch it. Go for the settings once again and check if the settings we modified are as we configured them in step 1.1:
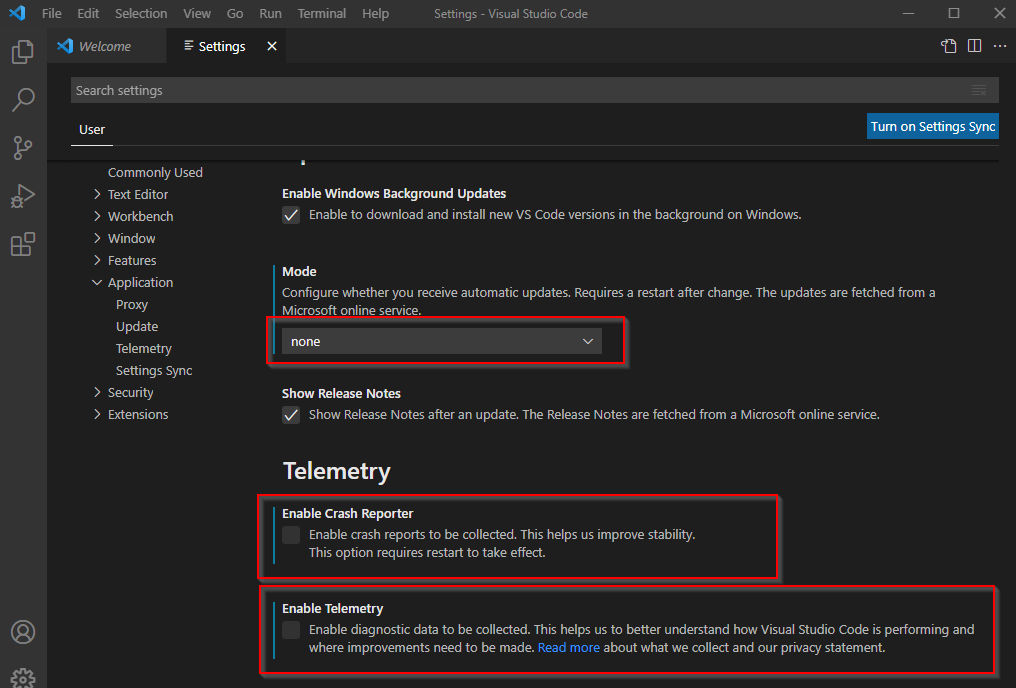
Well that is it. You can use the PolicyApplicator to configure Visual Studio Code as you need on your clients and make sure the settings stay in compliance with your policy. The PolicyApplicator will not only preconfigure Visual Studio Code but also remediate configuration changes by the user. If a user modifies settings apart from what is configured in your policy the settings will be merged so a user can still customize everything you do not enforce.
Check out the Configuration Reference to see how you can optimize your created Intune profile.