HelloImGui is a library that enables to write multiplatform Gui apps for Windows, Mac, Linux, iOS, Android, emscripten; with the simplicity of a "Hello World" app!
It is based on Dear ImGui, a Bloat-free Immediate Mode Graphical User interface for C++ with minimal dependencies.
Online Emscripten/Wasm demos:
| Hello, World | Advanced Docking | Classic ImGui Demo |
|---|---|---|
 |
 |
 |
| Code | Code | Code |
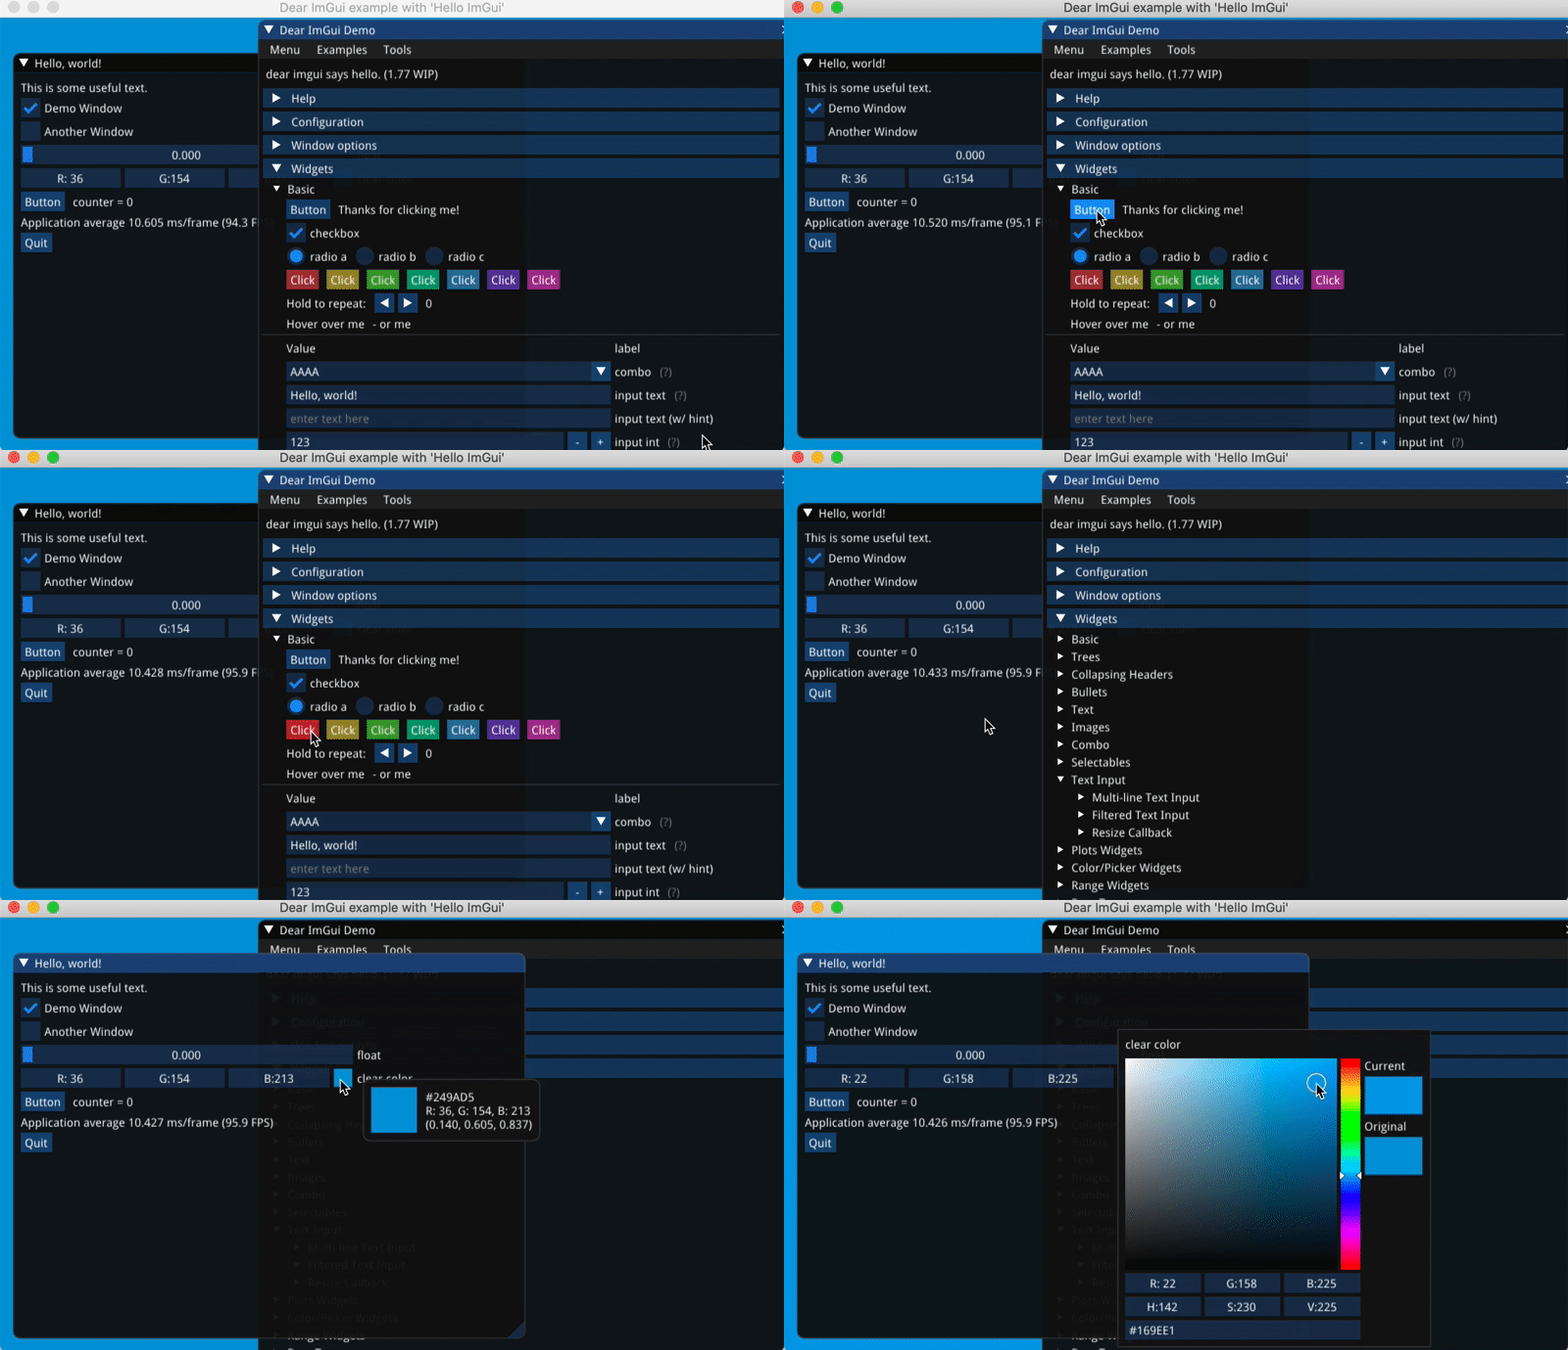
Below, a movie showing Hello ImGui running on 6 platforms:
Applications:
ImGui Manual uses Hello ImGui.
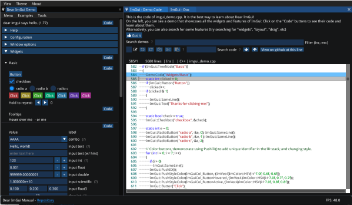
Just click on the image below to open it:
The video below gives a quick (2 minutes) introduction:
Instant develop
You can test Hello ImGui 3 minutes, without even installing anything! No IDE, no text editor, no library, no compiler is required.
Test ImGui application instant develop
Table of contents
- Hello, Dear ImGui
- Examples
- Features
- Supported platforms and backends
- Usage instructions and API
- Build instructions
- Embed assets and customize apps
- Alternatives
With HelloImGui, the equivalent of the "Hello, World!" can be written with 8 C++ lines + 2 CMake lines:
#include "hello_imgui/hello_imgui.h"
int main(int, char **)
{
    HelloImGui::Run(
        []{ ImGui::Text("Hello, world!"); }, // Gui code
        { 200.f, 50.f },                     // Window Size
        "Hello!" );                          // Window title
    return 0;
}include(hello_imgui_add_app)
hello_imgui_add_app(hello_world hello_world.main.cpp)Although this app was extremely simple to write, it will run with no additional modifications (including in the cmake code) on iOS, Android, Linux, Mac, Windows and Emscripten
Source for this example: src/hello_imgui_demos/hello_world
This example showcases various features of Hello ImGui.
 Online demo
Source for this example: src/hello_imgui_demos/hello_imgui_demodocking
hello_imgui_my_app is a separate repo that gives a working example on how to use the library as a submodule.
This example reproduces ImGui default example.
Source for this example: src/hello_imgui_demos/hello_imgui_demo_classic
- Docking support (based on ImGui docking branch)
- Default docking layout + View menu with option to restore the layout
- Status bar
- Log widget
- Zoom (especialy useful for mobile devices)
- Mobile apps specific callbacks (OnPause, OnResume, OnLowMemory)
- Mobile apps customization (icon, embedded files, etc)
- Windows
- Linux
- OSX
- iOS
- emscripten
- Android
- SDL2 + OpenGL 3 or OpenGLES3 for mobile devices
- Glfw3 + OpenGL 3
- Qt
Adding new backends should be easy: simply add a new derivate of AbstractRunner.
RunnerParams contains all the settings and callbacks in order to run an application.
Note: If you want to use HelloImGui in your own application, you may also want to look at hello_imgui_my_app, which is a separate repo that gives a working example on how to use the library as a submodule.
git clone https://github.com/pthom/hello_imgui.git
cd hello_imgui
git submodule update --initSeveral cmake options are provided: you need to select at least one backend:
option(HELLOIMGUI_USE_SDL_OPENGL3 "Build HelloImGui for SDL+OpenGL3" OFF)
option(HELLOIMGUI_USE_GLFW_OPENGL3 "Build HelloImGui for GLFW+OpenGL3" OFF)
option(HELLOIMGUI_USE_QT "Build HelloImGui for Qt" OFF)
option(HELLOIMGUI_USE_SDL_DIRECTX11 "Build HelloImGui for SDL+DirectX11" OFF)
"HELLOIMGUI_USE_SDL_OPENGL3" is the preferred backend, since it works under all platforms (windows, linux, osx, android, emscripten, iOS). On Mobile platforms, it will use OpenGLES3. Use it with cmake .. -DHELLOIMGUI_USE_SDL_OPENGL3=ON
You can install your backend by any mean (global install, Conan, submodule, etc).
Before adding the hello_imgui directory (add_subdirectory(hello_imgui)), just make
sure that your backend is available, and select it via one of the variables HELLOIMGUI_USE_SDL_OPENGL3,
HELLOIMGUI_USE_GLFW_OPENGL3, or HELLOIMGUI_USE_QT).
For example, the cmake script below works for the GLFW backend:
  # Here, glfw was added as a submodule into a folder "glfw"
  add_subdirectory(glfw)
  # We instruct HelloImgui to use glfw
  set(HELLOIMGUI_USE_GLFW_OPENGL3 ON CACHE BOOL "" FORCE)
  # And add HelloImGui
add_subdirectory(hello_imgui)Vcpkg is a C++ Library Manager for Windows, Linux, and MacOS (support for iOS and Android is coming).
If you intend to use SDL of glfw, you can have them installed automatically via Vcpkg: simply run this command:
./tools/vcpkg_install_third_parties.pyThis script will download and build vcpkg, then install sdl2 and Glfw3 into hello_imgui/vcpkg/
You can then build HelloImgui, using the following instructions:
mkdir build
cd build
cmake -DCMAKE_TOOLCHAIN_FILE=../vcpkg/scripts/buildsystems/vcpkg.cmake -DHELLOIMGUI_USE_SDL_OPENGL3=ON ..
make -j4
(Use -DHELLOIMGUI_USE_GLFW_OPENGL3=ON for glfw)
Warning for SDL apps under iOS and Android:
SDL uses a dirty hack in order to replace your main() function by its own main() function, which will then call your own main !
Please make sure that the signature of your main() function is exactly
int main(int argc, char **argv)
and that your main() function returns an int.
Requirements:
- You need to have Qt >= 5.10 installed
- The Qt backend uses qtimgui , which you need to download into external/qutimgui. You can use the script tools/qtimgui_download.py in order to download it in one step.
Usage: simply pass the option -DHELLOIMGUI_USE_QT=ON and specify the path to Qt via CMAKE_PREFIX_PATH.
For example, this line would build with Qt backend for an androïd_armv7 target:
cmake -DCMAKE_PREFIX_PATH=/path/to/Qt/5.12.8/clang_64 -DHELLOIMGUI_USE_QT=ON"SDL + OpenGL ES3" is currently the preferred backend for iOS.
This project uses the ios-cmake toolchain which is a submodule in the folder hello_imgui_cmake/ios-cmake.
- First, you need to download and compile SDL
Launch tools/ios/sdl_compile_ios.sh, which will download and compile SDL for iOS and the simulator, into the folder "external/SDL"
./tools/ios/sdl_compile_ios.sh- Set your development team Id inside tools/ios/set_dev_team.source
Edit the file and replace the id with your own team id.
export CMAKE_XCODE_ATTRIBUTE_DEVELOPMENT_TEAM="0123456789"- Source tools/ios/set_dev_team.source in order to add the CMAKE_XCODE_ATTRIBUTE_DEVELOPMENT_TEAM environment variable
source tools/ios/set_dev_team.source- Launch cmake using ./tools/ios/cmake_ios_sdl.sh:
mkdir build_ios && cd build_ios_sdl
../tools/ios/cmake_ios_sdl.sh
This will invoke cmake and then open the project "HelloImGui.xcodeproj".
If you want to run cmake by yourself, here are the required commands:
mkdir build_ios_sdl
cd build_ios_sdl
export CMAKE_XCODE_ATTRIBUTE_DEVELOPMENT_TEAM=YourTeamIdHere
cmake .. \
  -GXcode \
  -DCMAKE_TOOLCHAIN_FILE=../hello_imgui_cmake/ios-cmake/ios.toolchain.cmake \
  -DHELLOIMGUI_USE_SDL_OPENGL3=ON \
  -DPLATFORM=OS64 \
  -DENABLE_BITCODE=OFF \
.. \See Embed assets and customize apps
emscripten is a toolchain for compiling to asm.js and WebAssembly, built using LLVM, that lets you run C and C++ on the web at near-native speed without plugins.
You can either install emsdk following the instruction on the emscripten website or you can use the script tools/emscripten/cmake_emscripten.sh.
./tools/emscripten/install_emscripten.shThis script will download and install emscripten into ~/emsdk
- Add emsdk to your shell path;
You need to source the script ~/emsdk/emsdk_env.sh
source ~/emsdk/emsdk_env.sh- Run cmake, using "emcmake":
mkdir build_emscripten
cd build_emscripten
emcmake cmake .. -DHELLOIMGUI_USE_SDL_OPENGL3=ON ..
Note: the script tools/emscripten/cmake_emscripten.sh does the cmake part of this.
- Build
make -j 4- Test your emscripten application
You will need a web server. Python provides a basic web server that is easy to usen which you can launch like this:
cd build_emscripten
python3 -m http.server
Open a browser, and navigate to http://localhost:8000.
For example, the docking demo will be available at http://localhost:8000/src/hello_imgui_demos/hello_imgui_demodocking/hello_imgui_demodocking.html
Refer to the emscripten docs
By default, the application will be presented inside an empty html page. You can adapt this page by modyfing the "shell": copy the file hello_imgui_cmake/emscripten/shell.emscripten.html into your app source dir, and adapt it to your needs.
The Android version uses SDL + OpenGLES3.
You need to download SDL manually for Android, like this:
./tools/sdl_download.shexport ANDROID_HOME=/path/to/AndroidSdkFor example (MacOS):
export ANDROID_HOME=/Users/Me/Library/Android/sdkBy default, the scripts will look for Android-ndk inside $ANDROID_HOME/ndk-bundle.
The script tools/android/cmake_arm-android.sh will invoke cmake with the android toolchain, and also create an Android Studio project which
is multiarch (arm64-v8a, armeabi-v7a, etc), via the option -DHELLOIMGUI_CREATE_ANDROID_STUDIO_PROJECT=ON (see tools/android/_impl_cmake_android.sh)
Run the following commands:
mkdir build_android
cd build_android
../tools/android/cmake_arm-android.sh
Your build directory will now look like this:
build_android/
├── CMakeCache.txt
├── ...
├── hello-imgui-demo-classic_AndroidStudio/
├── hello_imgui_demo_minimal_AndroidStudio/
├── hello_imgui_demodocking_AndroidStudio/
├── hello_world_AndroidStudio/
├── ...
The folders "xxxx_AndroidStudio" contain Android Studio projects, which you can use to build and debug your app.
You can now open (for example) the project hello_imgui_demodocking_AndroidStudio with Android Studio and run it / debug it.
You can also build the project manually via gradlew like this:
export JAVA_HOME=/Library/Java/JavaVirtualMachines/adoptopenjdk-8.jdk/Contents/Home
cd hello_imgui_demodocking_AndroidStudio
./gradlew build
Note: (you need to first set JAVA_HOME to the correct java version (Android requires exactly jdk8), the path given here is for MacOS users, where adoptopenjdk provides the correct version)
You can also install the app via command line, like this:
./gradlew installDebugAnything in the assets/ folder located beside the app's CMakeLists will be embedded
on mobile devices and emscripten, i.e they will be bundled together with the app; and you can access them via assetFileFullPath(const std::string& assetRelativeFilename).
For iOS, simply create a folder named "ios" beside the application 'CMakeLists.txt'. There, you can add a custom Info.plist, as well as app icons and launch screens.
For Android, simply create a folder named "android" beside the application 'CMakeLists.txt'. There, you can add a custom "res/" folder, containing your icons and application settings inside "res/values/".
hello_imgui_democking/
├── CMakeLists.txt                              # The app's CMakeLists
├── hello_imgui_demodocking.main.cpp            # its source code
│
│
├── assets/                                     # Anything in the assets/ folder located
│   └── fonts/                                  # beside the app's CMakeLists will be embedded
│       └── Akronim-Regular.ttf                 # on mobile devices and emscripten
│
│
├── android/                                    # android/ is where you customize the Android App
│   ├── mipmap-source/
│   │   ├── Readme.md
│   │   └── ic_launcher.png                     # an icon that helps creating the different sizes
│   └── res/                                    # anything in the res/ folder will be embedded as a resource
│       ├── mipmap-hdpi/
│       │   └── ic_launcher.png                 # icons with different sizes
│       ├── mipmap-mdpi/
│       │   └── ic_launcher.png
│       ├── mipmap-xhdpi/
│       │   └── ic_launcher.png
│       ├── mipmap-xxhdpi/
│       │   └── ic_launcher.png
│       ├── mipmap-xxxhdpi/
│       │   └── ic_launcher.png
│       └── values/
│           ├── colors.xml
│           ├── strings.xml                    # Customize the application icon label here
│           └── styles.xml
│
│
└── ios/                                        # ios/ is where you customize the iOS App
    │
    ├── Info.plist                              # If present, this Info.plist will be applied
    │                                           # (if not, a default is provided)
    │                                           # You can there customize the App icon name, etc.
    │
    └── icons/                                  # Icons and Launch images placed inside icons/
        ├── [email protected]   # will be placed in the application bundle
        ├── [email protected]                 # and thus used by the app
        ├── Default.png
        ├── Icon.png
        └── Readme.md
You can use the script tools/android/resize_icons.py in order to quickly create the icons with all the required sizes.
This script will create several android icons with correct size.
Your app folder should look like this:
your_app/
├── CMakeLists.txt
├── android/                  # Run this script from this folder
│   └── mipmap-source/
│       └── ic_launcher.png   # Put here a big version of your icon
├── assets/
├── hello_imgui_demodocking.main.cpp
└── ios/
Run this script from the subfolder android/ of your app folder. A folder named mipmap-source should be present in it, with an icon ic_launcher.png inside it
When running this script, several variations of the icons will be created:
your_app/
├── CMakeLists.txt
├── android/
│   ├── mipmap-source/
│   │   └── ic_launcher.png
│   └── res/
│       ├── mipmap-hdpi/
│       │   └── ic_launcher.png
│       ├── mipmap-mdpi/
│       │   └── ic_launcher.png
│       ├── mipmap-xhdpi/
│       │   └── ic_launcher.png
│       ├── mipmap-xxhdpi/
│       │   └── ic_launcher.png
│       └── mipmap-xxxhdpi/
│           └── ic_launcher.png
├── assets/
│   └── fonts/
│       └── Akronim-Regular.ttf
├── hello_imgui_demodocking.main.cpp
└── ios/
OpenFrameworks and Cinder are alternatives in order to quickly start a C++ application under many platforms.
Being oriented for creative coding, they are much more feature rich, offers some level of native hardware access (camera, accelerometer), but they are also less lightweight than ImGui + HelloImGui.
sokol_app is a minimal cross-platform application-wrapper library.


