-
Notifications
You must be signed in to change notification settings - Fork 791
Kinect mapping
Tutorial about mapping an environment using a handheld Kinect.
-
Open RTAB-Map. At the first start, RTAB-Map tells you that it will put some data (database, screenshots...) in your documents folder.
$ rtabmap


-
(RTAB-Map>=0.7.1) When the GUI is opened, the actions are disabled like in the first screenshot below. You need to create a new database or open a previous session to continue to map in it. Here we will create a new database, so click on "File -> New database..." like in the second screenshot. The third screenshot shows the progress dialog telling that the database is initialized.


-
By default, the OpenNI driver is used for the Kinect sensor. If you have an ASUS Xtion, you may want to select OpenNI2 driver, as in the screenshot below. If RTAB-Map is built with Freenect, Freenect driver could be also used with the Kinect.

-
Start mapping using the "Start" button.


-
When a loop closure is found, the matching image is shown with a green background.

-
To see more clearly the loop closures found, you can open the "3D loop closure" panel: Window->Show view->3D Loop closure. By using numbers 1->5 on the keypad, you can change how point clouds are shown (random colors, axis oriented colors or RGB).


-
When the background turns RED, it means that odometry cannot be computed, i.e. the odometry is lost and the mapping cannot continue. These events would cause RED screens:
- Featureless environments: white walls, uniform texture, dark areas, etc. Without enough features, odometry cannot be computed. Odometry quality would be over 100 for environments with enough visual features.
- "Empty space" environments: For sensors like the Kinect, good features are within around 0.4 to 4 meters of the sensor. For example, if you point the sensor over a clear area where there are no objects under 4 meters, there are good chances that the odometry will lose tracking.
- Too fast camera motion for the framerate: If the camera is moved too fast, there will be less features to match between successive frames. RGB images can be also blurry depending of the camera, which decreases the number of good visual matches between frames.
- A misalignment between the depth and RGB images: If the depth of the visual features is wrong, this would have a negative impact on the odometry. Make sure that depth images are correctly registered to RGB images like here.
-
To recover from lost odometry, replace the camera where it failed to compute the odometry: the camera pose may be tracked again (the RED background disappears) and the mapping should continue. If you always lose odometry at the same place in your environment, try to add texture/objects to the scene to add more visual features to track. If you have a textured ground, you could tilt a little the camera to be able to track visual features from the ground.

-
To recover from lost odometry, you could also reset the odometry using "Detection -> Reset odometry" (on ROS:
$rosservice call /reset_odom). Don't forget to replace the camera to a scene with a lot of texture before resetting, otherwise the odometry won't still be able to start at all (RED background will stay here). Resetting the odometry will make RTAB-Map to create a new map, so the map should disappear and a new one is shown:
-
When a loop closure is detected with the old map, it should re-appear:

-
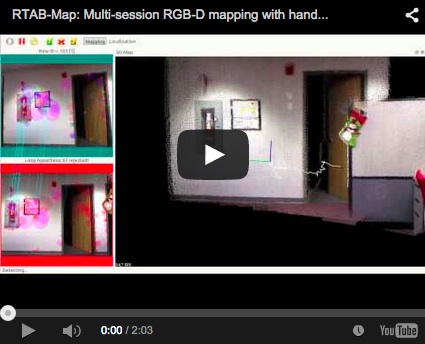
Here a video example showing what happens on odometry reset and map merging.
-
(RTAB-Map>=0.7.1) RTAB-Map has the ability to automatically merge mapping sessions together, like appending new scans to a previous map. When you press pause/resume, the mapping continues from the last pose in the same map. If you stop the mapping, then start again, a new map is created in the current database: when a loop closure will be found between the current mapping session and a previous one in the database, the maps will be merged together. When you want to start a new mapping session from a clean database, you should close the current one and create a new one, press "File->Close database" (note that a backup of the current database is automatically saved):


-
If you want to clear the current mapping session, press "Edit -> Delete memory".

-
(RTAB-Map>=0.7.1) If you want to continue mapping in a previously saved session or to export the point clouds of a previous session, you can do: "File -> Open database...":


-
The database is initialized but nothing shown yet in the GUI. You should download the clouds from the database to the GUI to see them, press "Download all clouds (update cache)":

-
A small dialog should open with "Global map optimized" already selected, press OK and a progress dialog will open:


-
Now you should see the clouds of the previous session.
-
You can export the point clouds in PCD or PLY formats: "File -> Export 3D clouds (
*.ply*.pcd)". If you just opened a database, you should do "Edit -> Download all clouds (update cache)" to enable the Export action.
-
The "Export 3D clouds..." dialog will open with some options to export the clouds. By default, the clouds are regenerated with more points and are assembled together:


-
When saved to PLY format, the cloud can be imported to any 3D applications, here imported in MeshLab:

-
When saved to PCD format, you can open the point clouds with pcl_viewer:
$ pcl_viewer cloud*

-
To know the constraints used in the graph, you can generate the TORO graph, this will save the poses of each node and the links (odometry and loop closure constraints) between them. You can select whether you want the graph optimized or not.

VERTEX3 1 -0.487161 0.497615 -0.457941 -0.140045 -0.190645 -0.440158
VERTEX3 2 -0.488029 0.496808 -0.456870 -0.139456 -0.190018 -0.439254
VERTEX3 3 -0.486170 0.499928 -0.457844 -0.140213 -0.190512 -0.441440
VERTEX3 4 -0.487552 0.496047 -0.457573 -0.137795 -0.190239 -0.439541
VERTEX3 5 -0.487681 0.495221 -0.457093 -0.138144 -0.189963 -0.438671
VERTEX3 6 -0.487354 0.495988 -0.458522 -0.138571 -0.190634 -0.439124
[...]
EDGE3 1 2 -0.001122 0.000234 0.002675 -0.001059 0.001952 -0.000275 1 0 0 0 0 0 1 0 0 0 0 1 0 0 0 1 0 0 1 0 1
EDGE3 2 3 -0.000257 -0.001027 0.000539 -0.000240 -0.000039 0.000980 1 0 0 0 0 0 1 0 0 0 0 1 0 0 0 1 0 0 1 0 1
EDGE3 3 4 -0.002841 -0.002771 0.001017 0.006640 -0.000192 0.000507 1 0 0 0 0 0 1 0 0 0 0 1 0 0 0 1 0 0 1 0 1
EDGE3 3 1 -0.000000 -0.000000 0.000000 0.000000 0.000000 0.000000 1 0 0 0 0 0 1 0 0 0 0 1 0 0 0 1 0 0 1 0 1
EDGE3 4 5 -0.000165 0.001504 -0.001403 0.000698 -0.000963 -0.000977 1 0 0 0 0 0 1 0 0 0 0 1 0 0 0 1 0 0 1 0 1
EDGE3 4 1 0.000000 0.000000 0.000000 -0.000000 0.000000 0.000000 1 0 0 0 0 0 1 0 0 0 0 1 0 0 0 1 0 0 1 0 1
EDGE3 4 2 0.000610 0.001493 0.001027 -0.001396 0.000515 -0.000822 1 0 0 0 0 0 1 0 0 0 0 1 0 0 0 1 0 0 1 0 1
EDGE3 5 6 0.000079 0.000609 -0.000993 0.000083 -0.000677 -0.000252 1 0 0 0 0 0 1 0 0 0 0 1 0 0 0 1 0 0 1 0 1
EDGE3 5 1 -0.002703 -0.000298 -0.001471 -0.002082 -0.001686 -0.000104 1 0 0 0 0 0 1 0 0 0 0 1 0 0 0 1 0 0 1 0 1
EDGE3 5 2 -0.000000 0.000000 0.000000 -0.000000 0.000000 -0.000000 1 0 0 0 0 0 1 0 0 0 0 1 0 0 0 1 0 0 1 0 1
EDGE3 5 3 -0.001887 0.000871 -0.008452 0.001067 -0.006083 -0.000940 1 0 0 0 0 0 1 0 0 0 0 1 0 0 0 1 0 0 1 0 1
EDGE3 6 7 -0.000337 -0.000881 -0.000683 0.000078 -0.000878 0.000886 1 0 0 0 0 0 1 0 0 0 0 1 0 0 0 1 0 0 1 0 1
EDGE3 6 1 -0.001197 0.005586 0.001946 -0.003419 0.001207 -0.004001 1 0 0 0 0 0 1 0 0 0 0 1 0 0 0 1 0 0 1 0 1
EDGE3 6 2 -0.001600 -0.002833 0.000011 -0.001111 0.000138 0.002364 1 0 0 0 0 0 1 0 0 0 0 1 0 0 0 1 0 0 1 0 1
EDGE3 6 3 -0.001129 0.009211 0.004070 -0.006041 0.002271 -0.004176 1 0 0 0 0 0 1 0 0 0 0 1 0 0 0 1 0 0 1 0 1
EDGE3 6 4 -0.000277 -0.001431 -0.001244 0.003501 -0.001753 -0.000819 1 0 0 0 0 0 1 0 0 0 0 1 0 0 0 1 0 0 1 0 1
[...]
A RTAB-Map's database can be replayed as input source to test different mapping and loop closure detection parameters. Open Preferences dialog, then under Source tab, set "Source type" to Database. Scroll down to select the database.
There is an important option called "Ignore odometry saved in the database, so if RGB-D SLAM is activated, odometry will be recomputed.":
- You should not check it if the database was created during a normal mapping session. The default mapping frame rate is 1 Hz and it is not enough fast to recompute the odometry, unless the camera is moving very slow.
- You should check it if the database was created using the rtabmap-data_recorder tool. The same tool can also be found under the menu Tool->"Data recorder..." in the main window:
- Open RTAB-Map, select Tools->"Data recorder..." and then start mapping as usual. The data recorder will record at the frame rate set in Source tab of the Preferences dialog. Be aware that at 30Hz, the database generated by the data recorder will grow very fast. For example, here for about 8 seconds of recording, 57 MB is used for 243 frames.
- On my computer, the odometry can't run over 20Hz, so generally I record at 15-20Hz source rate to save some space. But yes, this gives large databases.
- If you want to compare Odometry parameters, you should use this option as the images are recorded at higher frame rate.
- Open RTAB-Map, select Tools->"Data recorder..." and then start mapping as usual. The data recorder will record at the frame rate set in Source tab of the Preferences dialog. Be aware that at 30Hz, the database generated by the data recorder will grow very fast. For example, here for about 8 seconds of recording, 57 MB is used for 243 frames.


